In this tutorial we are going through couple of details to keep in mind while setting up your Sitelok control panel.
Since you have already uploaded the cms-data folder to your server, all the sample courses, blogs and authors are already in the CMS. It makes sense now to setup Sitelok the same way as in this Demo project file so you can start editing from a good starting point.
Usergroups
The first thing you can setup is the Usergroups list. The following image shows you all the USERGROUPS we have setup for this demo file. Create the same USERGROUPS on your Sitelok cPanel!
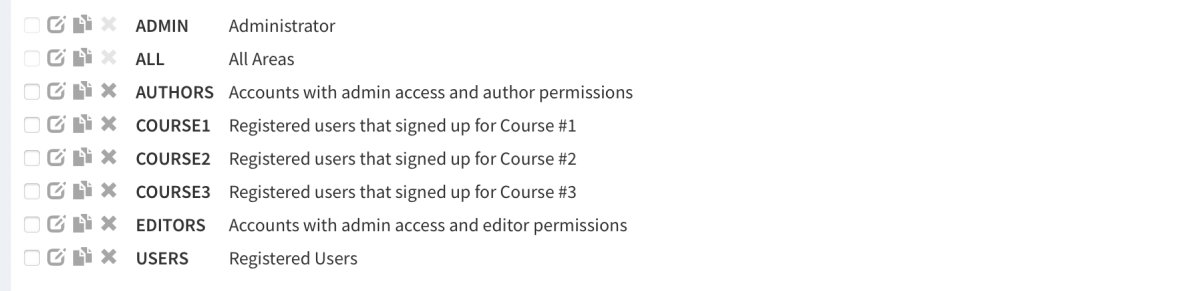
Now that you have created all the needed user group permission levels, you can add new authors and editors. Check the following list to understand the permission levels set in Mentor Project file.
Usergroups permissions:
ADMIN: Can access/edit every part of the website
EDITOR: Can access/edit all the admin area but do not have access to Sitelok
AUTHOR: Can only add/edit Blog posts that he/she wrote.
List of Users
In the Mentor folder you downloaded there is the user list used in this demo website in case you want to import it in your Sitelok control panel. You will find a .csv file called sample-sitelokusers.csv that you can easily import in Sitelok.
If you are having trouble import the users list consult the Sitelok manual on how to import lists of users.
Email Templates
Sitelok comes with simple text emails for all the case scenarios you might run into with your project personalization. In case you want to use nicer HTML email instead of the default ones, we have built some HTML emails with the Email Stacks. You will find these email templates in the Mentor folder you downloaded.
Using and FTP app upload those .html emails into the following path on your server.
Those templates will automatically update with your own logo and website data. Make sure you setup correctly all your website data both in Sitelok configuration and Website admin.
You will notice we didn't replicate all the email templates that Sitelok comes with, but you can easily edit the ones we made with the content that fits your case scenario.
Forms
Forms are a key component of Sitelok. It's through forms that users can register to Usergroups and acquire the related permissions from the user group.
Mentor uses 3 different types of forms:
- Registration Forms (allow users to create a new account).
- Update Profile Forms (allow users to edit their personal information autonomously).
- Login Forms (allow registered users to login)
Registration Forms
Check how each of those form has an ID right next to each name. The ones highlighted are the ones created in Cleo Pro. When you create the ones needed for your own website make sure you update the form IDs in the project file, they may be different than the ones set in the project by default.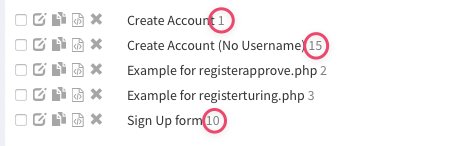
If you need to edit the data on the default login form click on the edit button next to it. You could even delete forms ID 2 and 3 since they are not in use in Mentor.

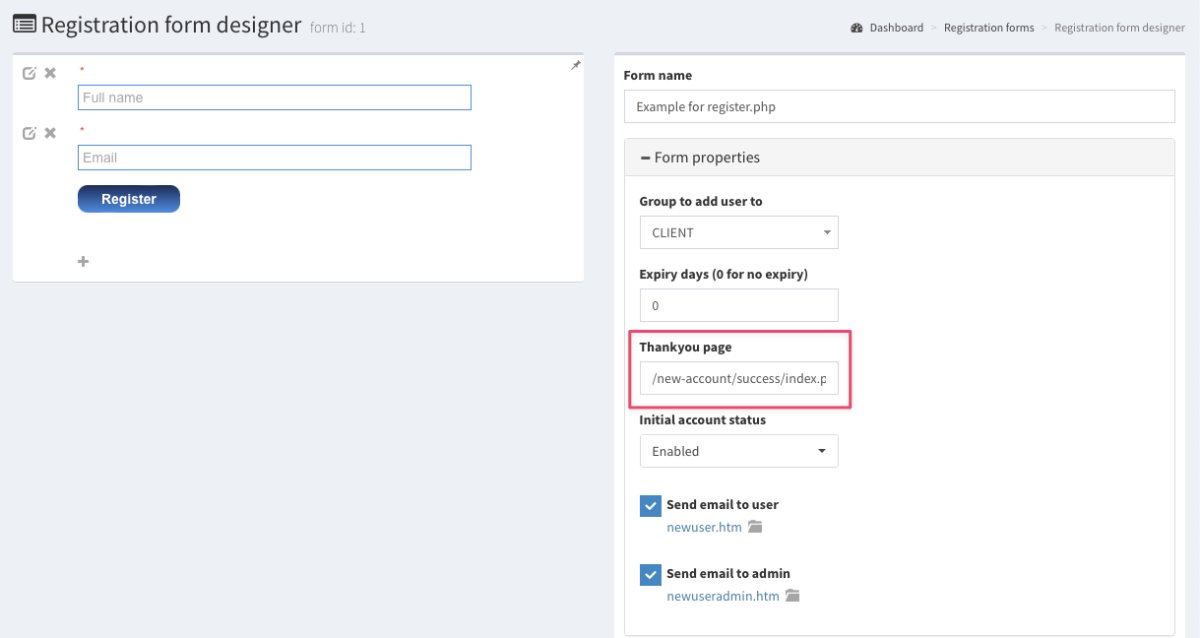
This is how registration form 1 looks on the sitelok cPanel on this demo file. Please note that the registration form is set to redirect users to /new-account/success/index.php after a successful registration.
Update Profile Forms
Those forms are used in the account page (only accessible to registered users) to let users update their own data.

Login Forms
Login forms allow users to get access to their account. Mentor uses the login form ID: 5 that comes with the default installation of Sitelok.
Login to unlok the rest of this post
Only registered users can read the rest of this article and leave comments. Not registered yet? Create a free account now.


Login to comment
Comments are only available to registered users. Not registered yet? Create a free account now.